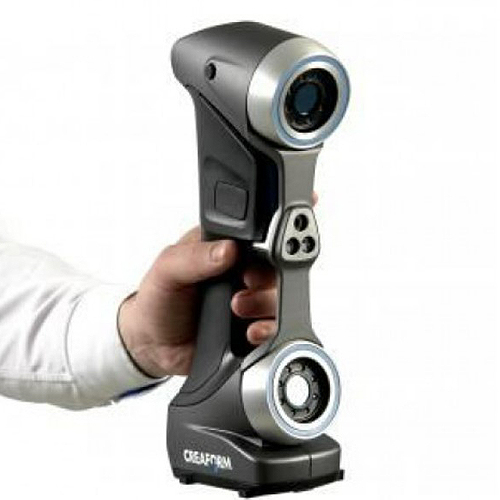
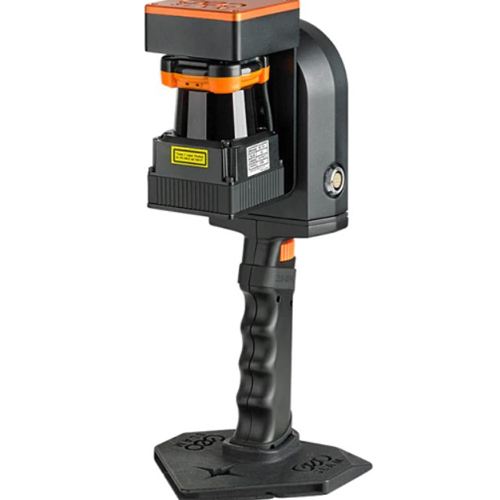
New Creaform HandySCAN 300 3D Scanner
Creaform HandySCAN 300 3D scanner is now more portable than ever and is faster at delivering accurate and high resolution 3D scans while remaining simple to use. With dynamic referencing you can take the system anywhere and have accurate and repeatable 3D scanning results in any environment. It is the perfect tool for reverse engineering and inspection across the entire product development lifecycle.
Creaform HandySCAN 300 3D scanner is now more portable than ever and is faster at delivering accurate and high resolution 3D scans while remaining simple to use. With dynamic referencing you can take the system anywhere and have accurate and repeatable 3D scanning results in any environment. It is the perfect tool for reverse engineering and inspection across the entire product development lifecycle.
Creaform HandySCAN 300 new generation HandySCAN 3D truly portable metrology-grade 3d scanner, have been optimized to meet the needs of product development and engineering professionals on the lookout for the most effective and reliable way to acquire 3D measurements of physical objects.
Includes:
- Creaform HandySCAN 300
- VXelements Software License
- Power supply
- USB cable
- Calibration plate
- Carrying case
- Custom USB cable
- 1-Year warranty on Parts and Labor
NEW FEATURES
- 25 times faster than the previous generation
- 40% more accurate
- Improved ergonomy: 35% lighter, 50% smaller, Greater freedom of movement, Multi-function buttons for easier interaction with the software
TRUACCURACY
- Metrology-grade measurements: accuracy of up to 0.030 mm (0.0012 in.), resolution of up to 0.050 mm (0.002 in.), high repeatability and traceable certificate.
- Accuracy in real-life conditions: regardless of environment conditions, part set-up or user.
- No rigid setup required: optical reflectors are used to create a reference system that is “locked” to the part itself, so users can move the object any way they want during scanning sessions (dynamic referencing). Changes in surrounding environment have no impact on data acquisition quality or accuracy.
- Self-positioning: the HandySCAN 3D scanner is a data acquisition system and its own positioning system. This means that no external tracking or positioning devices is required. It uses triangulation to determine its relative position to the part in real time.
- Reliable: consistent and repeatable results across all work conditions or environments.
- On-demand user calibration: the scanner can be calibrated as often as necessary (day-to-day basis or before each new scanning session). Calibration takes about 2 minutes and guarantees optimal operation.
TRUPORTABILITY
- Stand-alone device: there is no need for an external positioning system, arms, tripod or fixture.
- On-the-go scanning: you can take it from place to place or use it in-house or on site.
- Lightweight: weights under 1 kg.
- Small: Fits into a case the size of a carry-on.
- Easy access to confined spaces: thanks to its small size and flexible stand-off distance.
SPEED
- Fastest 3D scanner on the market: 25 times faster than the previous generation.
- Highest measurement rate among all laser scanners: 480,000 measures/s.
- Automatic mesh output: ready-to-use files, right as you complete acquisition.
- Quick workflow integration: usable scan files can be imported into RE/CAD software without post-processing
TRUSIMPLICITY
- User-friendly: very short learning curve, regardless of the user’s experience level.
- Quick set-up: up and running in less than 2 minutes.
- Direct mesh output: no complicated alignment or point cloud processing.
- Real-time visualization: look at the computer screen to see what you are doing and what is left to be done.
- Versatile: virtually limitless 3D scanning – no matter the part size, complexity, material or color.
OTHER APPLICATIONS
- Museology/Heritage preservation
- Preservation, restoration and digital archiving
- 3D scanning for research, analysis and publishing
- Multimedia/Entertainment
- Computer graphics and special effects
VXELEMENTS SOFTWARE: CREAFORM’S 3D SOFTWARE PLATFORM
The HandySCAN 3D scanners come with VXelements, a fully integrated 3D software platform that powers our entire fleet of 3D scanning and measurement technologies. It gathers all the essential elements and tools into a user-friendly, simplified and sleek working environment. Its real-time visualization provides a simple, enjoyable scanning experience.
An optimized scan file is automatically created and available upon completion of the data acquisition step, which contributes to greatly shorten your part inspection or design process.
 VXSCAN: SCAN SOFTWARE MODULE
VXscan is entirely dedicated to the acquisition and optimization of 3D scanning data. It delivers high performance for that specific task, yet it is simple and user-friendly enough to suit any user’s experience level.
- User-friendly interface: VXelements was designed to simplify the whole scanning process to its essential core, through a powerful and simple process.
- Surface optimization algorithm: avoids the creation of multiple scan layers and ensures a more accurate mesh without any post-treatment;
- Direct mesh output: an optimized mesh can be exported in all standard formats, right as you complete acquisition. No complicated alignment or point cloud processing needed;
- No limitation to the scan resolution: you simply need to input a resolution value, independent from the size of the scanned object. Resolution can be changed at any time before/after the scan;
- Real-time visualization: the user can view the 3D surface as the object is being scanned;
- Scan results enhancement: hole filling, smart decimation, boundary filters, etc.
TECHNICAL SPECIFICATIONS
| HANDYSCAN 300 | HANDYSCAN 700 | ||
|---|---|---|---|
 Looking for the most efficient way to reverse engineer and/or design. The HandySCAN 300 is a reliable tool that will help you get there. Looking for the most efficient way to reverse engineer and/or design. The HandySCAN 300 is a reliable tool that will help you get there. |
 The HandySCAN 700 offers increased accuracy and resolution. It is the most versatile 3D scanner on the market for inspection and demanding reverse engineering. The HandySCAN 700 offers increased accuracy and resolution. It is the most versatile 3D scanner on the market for inspection and demanding reverse engineering. |
||
| Accuracy | Up to 0.040 mm (0.0016 in.) | Up to 0.030 mm (0.0012 in.) | |
| Volumetric accuracy* | 0.020 mm 0.100 mm/m (0.0008 in. 0.0012 in./ft) |
0.020 mm 0.060 mm/m (0.0008 in. 0.0007 in./ft) |
|
| Volumetric accuracy with | MaxSHOT Next™ | 0.020 mm 0.025 mm/m (0.0008 in 0.0003 in/ft) |
|
| MaxSHOT Next™|Elite | 0.020 mm 0.015 mm/m (0.0008 in 0.00018 in/ft) |
||
| Resolution | 0.100 mm (0.0039 in.) | 0.050 mm (0.0020 in.) | |
| Measurement rate | 205,000 measurements/s | 480,000 measurements/s | |
| Light source | 3 laser crosses | 7 laser crosses ( 1 extra line) | |
| Laser class | 2M (eye-safe) | ||
| Scanning area | 225 x 250 mm (8.8 x 9.8 in.) |
275 x 250 mm (10.8 x 9.8 in.) |
|
| Stand-off distance | 300 mm (11.8 in.) | ||
| Depth of field | 250 mm (9.8 in.) | ||
| Part size range (recommended) |
0.1 – 4 m (0.3 – 13 ft) | ||
| Software | VXelements | ||
| Output formats | .dae, .fbx, .ma, .obj, .ply, .stl, .txt, .wrl, .x3d, .x3dz, .zpr | ||
| Compatible software | 3D Systems (Geomagic® Solutions), InnovMetric Software (PolyWorks), Dassault (CATIA V5 and SolidWorks), PTC (Pro/ENGINEER), Siemens (NX and Solid Edge), Autodesk (Inventor, Alias, 3ds Max, Maya, Softimage). | ||
| Weight | 0.85 kg (1.9 lbs.) | ||
| Dimensions | 77 x 122 x 294 mm (3.0 x 4.8 x 11.6 in.) | ||
| Connection standard | 1 X USB 3.0 | ||
| Operating temperature range | 5-40 °C (41-104 °F) | ||
| Operating humidity range (non-condensing) | 10-90% | ||
